






Starting a friction saw correctly is crucial for ensuring its optimal performance, longevity, and safety. As a friction saw supplier, I've witnessed firsthand the importance of proper startup procedures. In this blog, I'll share the best way to start a friction saw, covering everything from pre - startup checks to the actual startup process.
Pre - Startup Checks
Machine Inspection
Before starting the friction saw, conduct a thorough visual inspection of the entire machine. Check for any signs of damage, such as cracks in the saw blade housing, loose bolts, or frayed electrical cords. A damaged machine can not only lead to poor cutting performance but also pose a significant safety risk. Ensure that all protective guards are in place and securely fastened. These guards are designed to prevent operators from coming into contact with moving parts during operation.
Blade Examination
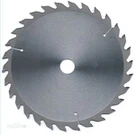
The saw blade is the heart of the friction saw. Inspect the blade for any signs of wear, chips, or dullness. A worn - out blade can cause uneven cuts, increased friction, and may even break during operation. If the blade shows significant wear, it should be replaced immediately. Also, make sure the blade is properly installed and tightened. An improperly installed blade can cause vibrations, which can affect the cutting quality and potentially damage the machine.
Lubrication and Cooling Systems
Friction saws generate a significant amount of heat during operation. Therefore, it's essential to check the lubrication and cooling systems. Ensure that the lubricant levels are sufficient. Proper lubrication reduces friction between the blade and the workpiece, which in turn reduces heat generation and extends the life of the blade. Similarly, check the coolant levels and the functionality of the cooling system. Adequate cooling helps to maintain the temperature of the blade and the machine, preventing overheating and potential damage.
Electrical and Control Systems
Inspect the electrical connections to ensure they are tight and free from damage. Loose or damaged electrical connections can cause power fluctuations, which can affect the performance of the saw and pose an electrical hazard. Test the control switches to make sure they are functioning correctly. This includes the start/stop switch, speed control, and any other control functions of the saw.
Preparing the Workpiece
Material Selection
Choose the appropriate workpiece material for the friction saw. Friction saws are designed to cut a variety of materials, such as steel, aluminum, and other metals. However, different materials may require different blade types and cutting parameters. For example, cutting stainless steel may require a different blade than cutting mild steel. Ensure that the material is clean and free from any contaminants, such as dirt, grease, or paint, as these can affect the cutting performance.
Workpiece Positioning
Properly position the workpiece on the saw table. Make sure it is securely clamped to prevent movement during the cutting process. Any movement of the workpiece can cause uneven cuts, damage to the blade, and potentially lead to accidents. Align the workpiece with the saw blade according to the desired cutting line. Use measuring tools, such as a ruler or a square, to ensure accurate alignment.
Startup Process
Powering On
Once all the pre - startup checks and workpiece preparations are complete, it's time to power on the friction saw. First, ensure that the power switch is in the off position. Then, plug the saw into a suitable power source. Check the voltage requirements of the saw to make sure they match the power source. Slowly turn the power switch to the on position. Observe the machine for any abnormal noises or vibrations during startup. If any abnormalities are detected, immediately turn off the power and investigate the cause.
Blade Warm - Up
After powering on the saw, allow the blade to warm up for a few minutes. This helps to ensure that the blade reaches its optimal operating temperature and reduces the risk of blade breakage during the initial cutting. During the warm - up period, the blade rotates at a low speed. You can set the speed control to the lowest setting initially.
Adjusting Cutting Parameters
Once the blade is warmed up, adjust the cutting parameters according to the material and the desired cutting depth. The cutting parameters typically include the cutting speed and the feed rate. The cutting speed is determined by the rotational speed of the blade, and the feed rate is the speed at which the workpiece is fed into the blade. Refer to the manufacturer's guidelines for the recommended cutting parameters for different materials. Adjusting the parameters correctly will ensure a clean, efficient cut and prolong the life of the blade.
During Operation
Monitoring the Cutting Process
During the cutting process, closely monitor the saw and the workpiece. Watch for any signs of abnormal vibrations, excessive heat, or changes in the cutting sound. These can be indicators of a problem, such as a dull blade, incorrect cutting parameters, or a misaligned workpiece. If any issues are detected, stop the saw immediately and make the necessary adjustments.
Maintaining a Steady Feed Rate
Maintain a steady and consistent feed rate when cutting the workpiece. A fluctuating feed rate can cause uneven cuts, increase the wear on the blade, and may even damage the machine. Use the feed control mechanism of the saw to ensure a smooth and continuous feed.
Post - Operation
Powering Off
After completing the cutting process, turn off the power switch of the saw. Allow the blade to come to a complete stop before approaching the machine. This is important for safety reasons, as the blade can still be spinning for a short time after the power is turned off.
Cleaning and Maintenance
Clean the saw and the work area after each use. Remove any metal chips, dust, or debris from the saw blade, the saw table, and the surrounding area. This helps to prevent the accumulation of contaminants, which can affect the performance of the saw. Also, perform regular maintenance tasks, such as lubricating the moving parts, checking the blade tension, and inspecting the electrical connections.
Related Products
If you're interested in other cutting machines related to friction saws, we also offer a range of high - quality products. For example, our Steel Tube Cutting Machine is designed for precise cutting of steel tubes. It offers high cutting efficiency and accuracy. Another product is our Computer Flying Saw, which features advanced computer control technology for more intelligent and precise cutting. And our Cold Flying Saw Machine is suitable for cold cutting applications, providing a clean and burr - free cut.


Conclusion
Starting a friction saw correctly is a multi - step process that involves pre - startup checks, workpiece preparation, proper startup, and post - operation maintenance. By following these steps, you can ensure the optimal performance, safety, and longevity of your friction saw. If you have any questions about starting a friction saw or are interested in purchasing our friction saws or related products, please feel free to contact us for further discussion and procurement.
References
- Machinery's Handbook: A comprehensive reference for mechanical engineers and machinists, which provides detailed information on cutting tools and machine operation.
- Friction Saw Manufacturer's Manuals: These manuals offer specific instructions and guidelines for the operation and maintenance of friction saws.