




Hey there! As an air compressor supplier, I've seen my fair share of issues with these machines. Air compressors are super useful, but like any piece of equipment, they can run into problems. In this blog, I'm gonna walk you through how to troubleshoot an air compressor.
1. Check the Power Supply
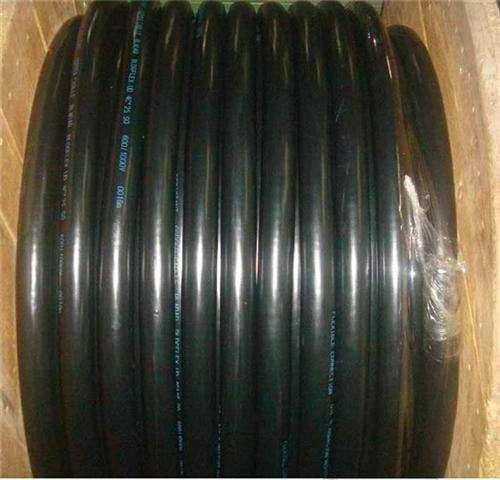
First things first, let's start with the power. If your air compressor isn't starting, the simplest thing to check is if it's getting power. Make sure the Cable is properly plugged in. Sometimes, a loose connection can be the culprit. You can also check the circuit breaker or fuse box. If a breaker has tripped or a fuse has blown, it'll cut off the power to the compressor. Just reset the breaker or replace the fuse and see if that does the trick.
If you're using an extension cord, double - check that it's the right gauge for your compressor. A cord that's too thin can cause a voltage drop, which might prevent the compressor from starting or make it run inefficiently.
2. Inspect the Air Filter
The air filter is a crucial part of the air compressor. A dirty or clogged air filter can restrict the airflow into the compressor. This can lead to a bunch of problems, like reduced performance, overheating, and increased wear and tear on the compressor components.
To check the air filter, locate it on the compressor. It's usually easy to spot. Remove the filter and take a look at it. If it's covered in dirt, dust, or debris, it's time to clean or replace it. Cleaning the filter depends on the type. Some filters can be washed with soap and water and then dried thoroughly before reinstalling. Others are disposable and need to be replaced with a new one.

3. Look at the Oil Level (for Oil - Lubricated Compressors)
If you have an oil - lubricated air compressor, the oil level is important. Low oil levels can cause excessive friction and heat, which can damage the compressor's internal parts.
Find the oil sight glass or dipstick on the compressor. Check the oil level according to the manufacturer's instructions. If the oil is below the recommended level, add the right type of oil. Make sure to use the oil specified in the compressor's manual. Using the wrong oil can cause problems like poor lubrication and increased sludge buildup.
4. Check for Air Leaks
Air leaks can be a real pain in the neck. They can cause the compressor to run longer than necessary, waste energy, and reduce the overall efficiency of the system.
To detect air leaks, you can use a simple soapy water solution. Mix some dish soap with water in a spray bottle. Then, spray the soapy water on all the connections, hoses, and fittings of the compressor. If there's an air leak, you'll see bubbles forming at the leak point.
Once you've found the leak, you can try to tighten the connection or replace the damaged part. Sometimes, a loose fitting can be easily tightened with a wrench. If a hose or gasket is damaged, you'll need to replace it.
5. Examine the Pressure Switch
The pressure switch controls when the compressor starts and stops. If the pressure switch is malfunctioning, the compressor might not start when it should or might keep running even when the tank is full.
You can test the pressure switch by using a multimeter. First, make sure the compressor is unplugged for safety. Then, remove the cover of the pressure switch and use the multimeter to check for continuity. Follow the manufacturer's instructions for the specific testing procedure.
If the pressure switch is faulty, you'll need to replace it. Make sure to get a switch that's compatible with your compressor.
6. Check the Belt (if applicable)
Some air compressors use a belt to transfer power from the motor to the compressor pump. A loose, worn, or damaged belt can cause problems.
Inspect the belt for signs of wear, such as cracks, fraying, or excessive stretching. If the belt is loose, you can usually adjust the tension. There are usually adjustment bolts on the compressor that allow you to tighten or loosen the belt. Refer to the manual for the correct tension adjustment procedure.
If the belt is severely worn or damaged, it needs to be replaced. When replacing the belt, make sure to get the right size and type for your compressor.
7. Look at the Safety Valve
The safety valve is designed to release excess pressure from the compressor tank to prevent it from exploding. If the safety valve is malfunctioning, it can be a serious safety hazard.
You can test the safety valve by manually lifting the valve's lever. When you do this, a small amount of air should be released. If no air is released or if the valve doesn't close properly after releasing the air, the valve might be faulty and should be replaced.
8. Check the Compressor Pump
The compressor pump is the heart of the air compressor. If there are issues with the pump, it can lead to all sorts of problems. Listen for any unusual noises coming from the pump, like knocking, rattling, or hissing. These noises can indicate problems like worn pistons, valves, or bearings.
If you suspect a problem with the pump, it's best to have a professional take a look. Pump repairs can be complex and require specialized tools and knowledge.
9. Inspect the Pipe Stacking Device (if relevant)
If your air compressor system includes a Pipe Stacking Device, make sure it's working properly. Check for any jams, misalignments, or mechanical issues. A malfunctioning stacking device can disrupt the overall operation of the system.
10. Consider the Environment
The environment where the air compressor is located can also affect its performance. If the compressor is in a hot, dirty, or humid area, it can face more challenges.
Make sure the compressor has enough ventilation. It should be placed in an area where there's good airflow around it. Avoid placing it in a corner or against a wall where the air can't circulate properly.
If the area is dirty, try to keep the compressor clean and protected. You might even consider using a dust cover. In a humid environment, you can use a dehumidifier to reduce the moisture in the air, which can prevent rust and corrosion in the compressor.
11. Check the Pressure Gauge
The pressure gauge shows the pressure inside the compressor tank. A faulty pressure gauge can give you inaccurate readings, which can make it hard to operate the compressor correctly.
You can test the pressure gauge by comparing its reading with another reliable pressure - measuring device. If the readings don't match, the gauge might be defective and need to be replaced.
12. Look at the Drain Valve
The drain valve on the compressor tank is used to remove condensed water from the tank. If the drain valve is clogged or not working properly, the water can accumulate in the tank, which can lead to rust and corrosion.
Periodically open the drain valve to let the water out. If the valve is clogged, you can try to clean it with a small wire or a pipe cleaner. If it's damaged, replace it with a new one.
Conclusion
Troubleshooting an air compressor might seem like a daunting task, but by following these steps, you can often identify and fix the most common problems. Remember, if you're ever unsure about something or if you can't fix the problem on your own, it's always a good idea to consult a professional.
As an air compressor supplier, I've got a wide range of high - quality compressors and Metal Briquetting Machine and other related equipment. If you're in the market for a new compressor or need parts and accessories for your existing one, don't hesitate to reach out. We're here to help you find the right solutions for your needs. Whether you're a small - business owner or a DIY enthusiast, we've got the products and expertise to keep your compressor running smoothly. So, if you're interested in purchasing or have any questions, feel free to contact us for a friendly chat and some great deals.
References
- Air Compressor Manufacturer's Manuals
- General Knowledge from Years of Experience in the Air Compressor Industry